
It’s always the simple stuff you forget how you do. For years I’ve mainly been working with JSON files, so when faced with that task of reading an XML file my brain went “I can do that” followed by “actually how did I used to do that?”.
So here’s two different methods. They work on .Net Core and theoretically .Net Framework (my project is .Net Core and haven’t checked that they do actually work on framework).
My examples are using an XML in the following format:
<?xml version="1.0" encoding="utf-8"?>
<jobs>
    <job>
        <company>Construction Co</company>
        <sector>Construction</sector>
        <salary>£50,000 - £60,000</salary>
        <active>true</active>
        <title>Recruitment Consultant - Construction Management</title>
    </job>
    <job>
        <company>Medical Co</company>
        <sector>Healthcare</sector>
        <salary>£60,000 - £70,000</salary>
        <active>false</active>
        <title>Junior Doctor</title>
    </job>
</jobs>
Method 1: Reading an XML file as a dynamic object
The first method is to load the XML file into a dynamic object. This is cheating slightly by first using Json Convert to convert the XML document into a JSON string and then deserializing that into a dynamic object.
using Newtonsoft.Json;
using System;
using System.Collections.Generic;
using System.Dynamic;
using System.IO;
using System.Text;
using System.Xml;
using System.Xml.Linq;

namespace XMLExportExample
{
    class Program
    {
        static void Main(string[] args)
        {
            string jobsxml = "<?xml version=\"1.0\" encoding=\"utf-8\"?><jobs>    <job><company>Construction Co</company><sector>Construction</sector><salary>£50,000 - £60,000</salary><active>true</active><title>Recruitment Consultant - Construction Management</title></job><job><company>Medical Co</company><sector>Healthcare</sector><salary>£60,000 - £70,000</salary><active>false</active><title>Junior Doctor</title></job></jobs>";

            byte[] byteArray = Encoding.UTF8.GetBytes(jobsxml);
            MemoryStream stream = new MemoryStream(byteArray);
            XDocument xdoc = XDocument.Load(stream);

            string jsonText = JsonConvert.SerializeXNode(xdoc);
            dynamic dyn = JsonConvert.DeserializeObject<ExpandoObject>(jsonText);

            foreach (dynamic job in dyn.jobs.job)
            {
                string company;
                if (IsPropertyExist(job, "company"))
                    company = job.company;

                string sector;
                if (IsPropertyExist(job, "sector"))
                    company = job.sector;

                string salary;
                if (IsPropertyExist(job, "salary"))
                    company = job.salary;

                string active;
                if (IsPropertyExist(job, "active"))
                    company = job.active;

                string title;
                if (IsPropertyExist(job, "title"))
                    company = job.title;

                // A property that doesn't exist
                string foop;
                if (IsPropertyExist(job, "foop"))
                    foop = job.foop;
            }

            Console.ReadLine();
        }

        public static bool IsPropertyExist(dynamic settings, string name)
        {
            if (settings is ExpandoObject)
                return ((IDictionary<string, object>)settings).ContainsKey(name);

            return settings.GetType().GetProperty(name) != null;
        }
    }
}
A foreach loop then goes through each of the jobs, and a helper function IsPropertyExist checks for the existence of a value before trying to read it.
Method 2: Deserializing with XmlSerializer
My second approach is to turn the XML file into classes and then deserialize the XML file into it.
This approch requires more code, but most of it can be auto generated by visual studio for us, and we end up with strongly typed objects.
Creating the XML classes from XML
To create the classes for the XML structure:
1. Create a new class file and remove the class that gets created. i.e. Your just left with this
using System;
using System.Collections.Generic;
using System.Text;

namespace XMLExportExample
{

}
2. Copy the content of the XML file to your clipboard
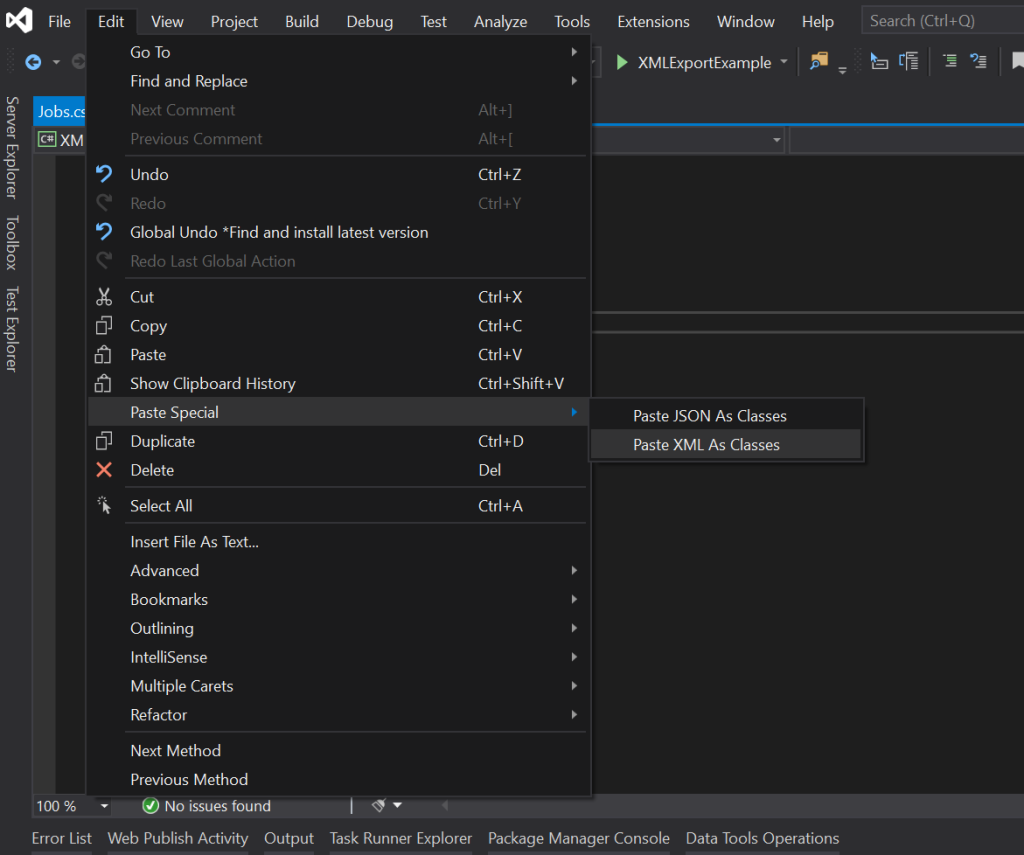
3. Select the position in the file you want to the classes to go and then go to Edit > Paste Special > Paste XML as Classes
If your using my XML you will now have a class file that looks like this:
using System;
using System.Collections.Generic;
using System.Text;

namespace XMLExportExample
{

    // NOTE: Generated code may require at least .NET Framework 4.5 or .NET Core/Standard 2.0.
    /// <remarks/>
    [System.SerializableAttribute()]
    [System.ComponentModel.DesignerCategoryAttribute("code")]
    [System.Xml.Serialization.XmlTypeAttribute(AnonymousType = true)]
    [System.Xml.Serialization.XmlRootAttribute(Namespace = "", IsNullable = false)]
    public partial class jobs
    {

        private jobsJob[] jobField;

        /// <remarks/>
        [System.Xml.Serialization.XmlElementAttribute("job")]
        public jobsJob[] job
        {
            get
            {
                return this.jobField;
            }
            set
            {
                this.jobField = value;
            }
        }
    }

    /// <remarks/>
    [System.SerializableAttribute()]
    [System.ComponentModel.DesignerCategoryAttribute("code")]
    [System.Xml.Serialization.XmlTypeAttribute(AnonymousType = true)]
    public partial class jobsJob
    {

        private string companyField;

        private string sectorField;

        private string salaryField;

        private bool activeField;

        private string titleField;

        /// <remarks/>
        public string company
        {
            get
            {
                return this.companyField;
            }
            set
            {
                this.companyField = value;
            }
        }

        /// <remarks/>
        public string sector
        {
            get
            {
                return this.sectorField;
            }
            set
            {
                this.sectorField = value;
            }
        }

        /// <remarks/>
        public string salary
        {
            get
            {
                return this.salaryField;
            }
            set
            {
                this.salaryField = value;
            }
        }

        /// <remarks/>
        public bool active
        {
            get
            {
                return this.activeField;
            }
            set
            {
                this.activeField = value;
            }
        }

        /// <remarks/>
        public string title
        {
            get
            {
                return this.titleField;
            }
            set
            {
                this.titleField = value;
            }
        }
    }

}
Notice that the active field was even picked up as being a bool.
Doing the Deserialization
To do the deserialization, first create an instance of XmlSerializer for the type of the object we want to deserialize too. In my case this is jobs.
var s = new System.Xml.Serialization.XmlSerializer(typeof(jobs));
Then call Deserialize passing in a XML Reader. I’m creating and XML reader on the stream I used in the dynamic example.
jobs o = (jobs)s.Deserialize(XmlReader.Create(stream));
The complete file now looks like this:
using System;
using System.IO;
using System.Text;
using System.Xml;

namespace XMLExportExample
{
    class Program
    {
        static void Main(string[] args)
        {
            string jobsxml = "<?xml version=\"1.0\" encoding=\"utf-8\"?><jobs>    <job><company>Construction Co</company><sector>Construction</sector><salary>£50,000 - £60,000</salary><active>true</active><title>Recruitment Consultant - Construction Management</title></job><job><company>Medical Co</company><sector>Healthcare</sector><salary>£60,000 - £70,000</salary><active>false</active><title>Junior Doctor</title></job></jobs>";

            byte[] byteArray = Encoding.UTF8.GetBytes(jobsxml);
            MemoryStream stream = new MemoryStream(byteArray);

            var s = new System.Xml.Serialization.XmlSerializer(typeof(jobs));
            jobs o = (jobs)s.Deserialize(XmlReader.Create(stream));

            Console.ReadLine();
        }
    }
}
And thats it. Any missing nodes in your XML will just be blank rather than causing an error.


