A first look at Sitecore SPEAK 3

SPEAK (Sitecore Process Enablement and Accelerator Kit) is the framework for constructing admin interfaces in Sitecore. It was introduced to the platform prior to Sitecore 8, but really became the way to do things after Sitecore 8’s UI refresh which introduced the start page and made accessing full page SPEAK applications logical.
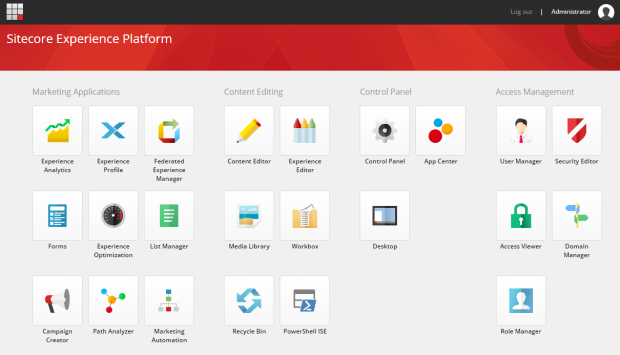
Sitecore9StartScreen

SPEAK 1 and 2

The goals of SPEAK were to:

  • Provide a streamlined approach to application development.
  • Enable reuse of UI elements.
  • Enforce a consistent look and feel.

In order to achieve this SPEAK 1 and 2 provides a component library of controls that can be used to construct pages. This ensures that the UI retains a consistent look and feel, and also minimizes the amount of work on a Sitecore developer. Logic is then added to an application using JavaScript for the front end and C# for server side code.

While this all sounds great many developers find SPEAK hard to use. In order to construct a UI out of the re-usable components, Sitecore lent on it’s existing functionality to be able to construct pages out of presentation items, however there is no WYSIWYG editor and the only real way to construct the layout is through Sitecore Rocks. This in itself isn’t awful, but when combined with the fact the average Sitecore developer doesn’t need to build an admin application that often, it presents a steep learning curve using a tool they may not use to put together components they’re not familiar with.

SPEAK 3

SPEAK 3 aims to address complaints in previous versions by introducing a completely new framework based on Angular.

Since SPEAKs initial incarnation, client side application development has moved on a long way, so rather than continuing to construct their own framework, Sitecore has chosen Angular as the the platform to use going forward.

Begin Angular, SPEAK 3 applications can run independently of Sitecore, however the purpose of SPEAK 3 is still to make it simple to integrate Sitecore-branded applications into the content manager.

My First Look

Before being a Sitecore back-end developer I worked on bespoke web based applications using client side frameworks such as Knockout, so the news that Sitecore was going to adopt Angular was great. Digging into Angular again however has given me a first hand experience of how fast the JavaScript world is changing. Gone is the promotion of MVC on the client being replaced with service/controller patterns. Whereas with Knockout and AngularJS (what Angular 1.x is now known as) we could add data binding to just an aspect of a page, Angular is really for running an entire application, routing and all.

Building an SPEAK 3 application really means building an Angular application with some modules provided by Sitecore. These modules will provide integration features such as:

  • Sitecore context
  • Translations for applications
  • Translations for the SPEAK 3 component library
  • Component user access authorization
  • Preventing cross-site request forgery (Anti-CSRF)

In addition to this the SPEAK 3 components will also sort out compatibility issues such as modifying the routing so that the application no longer needs to be in the route of the site and can be in a sub-folder of sitecore.

Angular for a Sitecore dev

To start it’s good to know an outline of what developing Angular involves.

Angular 2+ is built using TypeScript. You don’t need to use TypeScript, but as most of the examples are you probably will want to too. TypeScript is a superset of of JavaScript which adds strong typing support as well as other features of ECMAScript 2015 to backport it to older versions of JavaScript.

TypeScript needs to be compiled into JavaScript before it can run in the browser.

The easiest way to get started with Angular and TypeScript is using Node.js to install tools via NPM. Node is not a requirement for Angular and you won’t need it in production, but for local dev using Node to host your application can make life a lot easier.

Angular has a CLI which makes things easy to create and run an Angular application.

Visual Studio can be used as an IDE for TypeScript and Angular, but you might find life easier using Visual Studio Code.

It’s better than it sounds 🙂

All this might sound a bit daunting to the average C# developer. Technologies like Node and NPM traditionally are more at home in the open source community.

There is however a lot to be positive about. If your the type of dev that prefers writing c# to JavaScript, then the inclusion of TypeScript is going to please you, as it brings the type checking structure and class organisation that we’re used too.

The angular cli (command line interface) is also a reason to be pleased. One large difference between the .net and open source world has been the ability to click a button and get going. Open source typically comes with the setup of many components to get a solution working. At times when you try to learn something it can feel like your spending more effort doing setup that actual dev on the platform. Angular still needs to have all these components put together, but the cli takes care of all this for you, effectively recreating a file new project experience, just through a command line.

Sitecore Logging

One of the advantages of using a platform like Sitecore over completely bespoke development, is the number of features that are built-in that day to day you completely take for granted. An important one of those is logging.

If you’re building a bespoke application, adding some sort of support for generating log files can be a bit of a pain. Granted there are solutions that can be added to your project that do most of the lifting for you, but you still need to think about it, decide which to use and understand how to use it. With Sitecore the ability to write to a log file has been built in along with the logic that’s going to delete old log files and stop your servers hard disk filling up. Under the hood Sitecore is using Log4Net to generate log files, a side effect of this is that config changes can not be made using patch files.

Logs are written to the logs folder within your data folder. If your on Sitecore 8.2 or below this will be adjacent to your website folder. If your on Sitecore 9 or using Sitecore PaaS this will be in the App_Data folder within your sites folder.

The different log files

Sitecore generates 6 different log files while it’s running, these are:

Log – A general log file which you can write to
Crawling – Logs from the Sitecore Search Providers for crawling
Search – Logs from the Sitecore search providers for searches
Publishing – Logs generated during Sitecore publishes
FXM – Logs from federated experience manager
WebDAV – A log for WebDAV activity

Customizing the amount of detail

At different times you will likely want to see a different amount of detail in your log files. For instance on a production server you will want to keep logs to a minimum to maximise performance. However in a different environment where you are trying to debug an issue you would want all the logs you can get.

For this reason when writing a log a priority level is assigned and each log file can be configured to only write logs at a certain level or below to disk.

Priority levels are:

  1. DEBUG
  2. INFO
  3. WARN
  4. ERROR
  5. FATAL

To configure what level of logging should be output, configure the priority value in the log4net section of the web.config file.

<log4net>
  <appender name="LogFileAppender" 
            type="log4net.Appender.SitecoreLogFileAppender, Sitecore.Logging">
    <file value="$(dataFolder)/logs/log.{date}.txt" />
    <appendToFile value="true" />
    <layout type="log4net.Layout.PatternLayout">
      <conversionPattern value="%4t %d{ABSOLUTE} %-5p %m%n" />
    </layout>
  </appender>
  <root>
    <priority value="INFO" />
    <appender-ref ref="LogFileAppender" />
  </root>
</log4net>


Writing to the log file

Writing to the log file is super easy to do from within your Sitecore application. The Sitecore.Diagnostics.Log class contains static functions to write to the general log file at different priority levels.

// Writes a log at the error priority level
Sitecore.Diagnostics.Log.Error("That wasn't meant to happen", this);

Cloud Hosting IaaS vs PaaS

A topic I hear from clients fairly regularly these days is a plan to move to “the cloud”, or we take over a site built by someone else thats hosted in “the cloud”. However in virtually every case it’s an IaaS setup and they don’t really know what the difference between IaaS and PaaS is.

What is IaaS?

So what is infrastructure as a service (IaaS for short)? To put it quite simply, IaaS in the cloud, be that Azure or AWS takes away the burden of managing your own or rented servers.

Anyone who’s worked in a corporate environment can tell you getting some new servers can be a lengthy process. Someone needs to arrange for them to be purchased, placed in a physical location, software installed etc. Even when the management of this has been outsourced to another company, it still remains a lengthy process.

Equally anyone working for a small company can tell you its not much better. There may be a lot less approval processes to jump through, but your on your own trying to buy and set up this kit from somewhere.

IaaS solves this by providing a very very quick service where you request a specific setup and a VM gets created for you ready to go in a couple of minutes. You can pick from a range of locations around the world and when you don’t need it any more you turn it off. There’s no large commitments to keeping a server for 6 months, you pay by the minute scaling up and down as needed.

IaaS is very simple to replace your current setup as its essentially the same thing just with much better management control around it.

What is PaaS?

Platform as a service (PaaS), is what people really mean when they talk about the future and the cloud. If you go to a conference and hear Microsoft talk about Azure, you can be 99% certain its a PaaS service they’re talking about.

To understand it think about the process of getting some office space. You could buy a plot of land, have a building placed on it and turn it into your office. But when the roof leaks you’ll need to arrange for that to be fixed, you’ll need to arrange regular fire alarm tests to make sure everyone remains safe, and when an issue is discovered in the buildings security you’ll need to get that fixed to. You didn’t really want to be a building manager, but that’s what’s happened.

The alternative is to rent some office space and leave the management to somebody else. All you have to do is follow some rules like don’t go on the roof and don’t go in that cupboard where all the fire alarm equipment is.

PaaS is a bit like this, we didn’t really want a box running Windows Server that we need to keep secure and up to date. We just want a SQL Server DB and that traditionally comes with a need to have a server to run it on. Equally for hosting a website we really just want somewhere our sites going to run, in the same way that for office space we just want somewhere for our staff to sit. It’s unlikely that we’re ever going to use these servers for more than one purpose so we don’t really need a generic system that allows us to install a multitude of things.

So with PaaS rather than buying a server your buying a service, which could be a web application, a db or many other things. As this is no longer just buying server space there are a number of restrictions. For example with a web application saving anything on the file system is rules out. Your application is going to be there but part of what makes it possible for all the server updates to be done for you is that at any time your application could be moved to a brand new server, anything not in the package to set it up will be lost.